• Camping
  • Sports
  • BBQ
  • Home
  • Pets

Beloved Green

Love Green, Eat Green, Live Green

How to Clean a Carburetor on a Pressure Washer?

How to Clean a Carburetor on a Pressure Washer?

March 19, 2020 By clarkie Leave a Comment

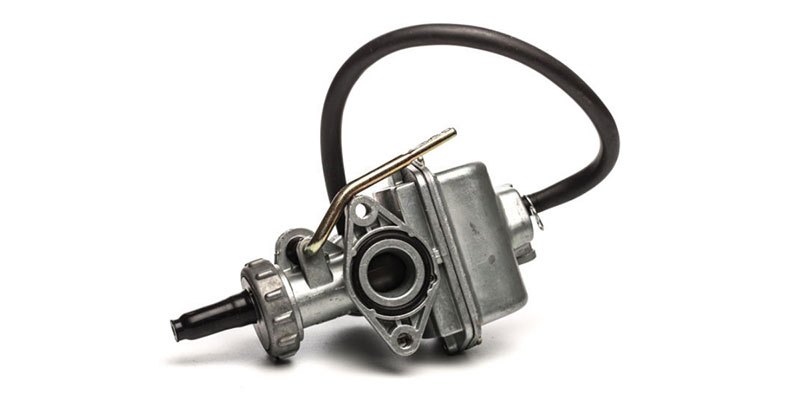
Carburetor is one of the major parts of any engine. You will definitely get a carburetor in any type of combustion engine, for instance, the gas pressure washer. It is where the air mixes with the fuel for combustion to take place.

It is therefore prudent to clean your carburetors as often as possible. And if the pressure washer pump has failed, you need to consider buying a new one

Are you stuck on how to clean your carburetor on your pressure washer?

Well, then, here is a step by step guide on how to clean your carburetor not only on a pressure washer but also on the other types of engines.

Although carburetors look different, this process can be used to clean all types of carburetors since they all exhibit almost the same layout and functions.

how to clean out a carburetor on a pressure washer

1. Remove the Carburetor From the Pressure Washer

The first step is to remove the carburetor from the pressure washer. You can do this by turning the fuel valve off while tracking the fuel line down to the carb. You can then remove both the overflow hose and the hose at the carb.

Remove all the screws and clamps in the carbs both rear and front. The carburetor will then be left loose, you can now remove it by twisting and wiggling it. However, if the carburetor is still held by the throttle, you can remove the throttle by twisting the top cap or by unscrewing it.

2. Remove the Float Bowl

how to fix a carburetor on a pressure washer

The next step is to remove the float.

You can do this by unscrewing all the four screws located at the bottom of the carburetor then you can remove the float bowl by pulling it off the carburetor.

Note that these screws should be removed with a lot of care since they can easily strip. Also if you have no plans to replace the gasket then ensure it remains intact.

You can use a pair of pliers to remove the float pins.

3. Remove All the Jets and the Outer Parts

Once the float bowl is removed, you can then remove all the jets and the outer last parts. If you have a carburetor with splash plates, then you need to take all of them off in order to get to the jets.

However, if your carburetor does not have them, then you can remove the jets directly using a screwdriver to remove the skinny and long pilot jets.

However, for the main jet, you will have to use a hex head since its short and fat.

4. Clean the Carburetor and Return It to the Pressure Washer

how to clean a carburetor on a power washer

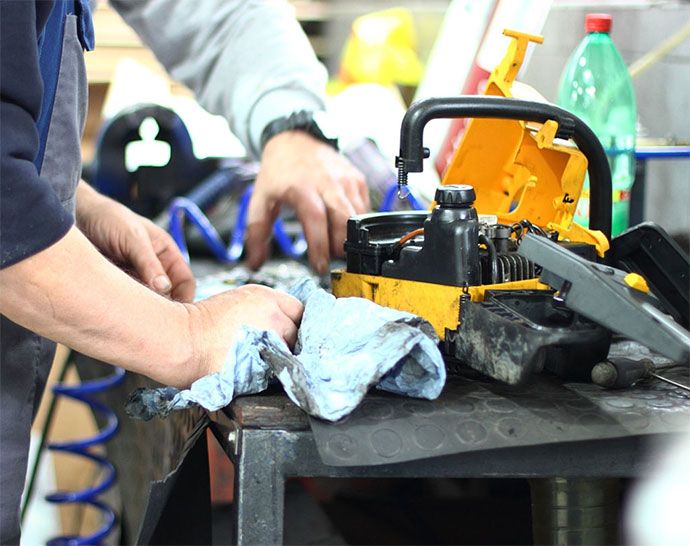
Lastly, you can now clean your carburetor.

Ensure you remove all the gaskets and O-rings before you start this process. You can clean your carburetor by soaking all the parts in a gallon. You can also clean the parts of the carburetor by scrubbing them using a wire brush then spraying them with choke or carb.

Spray all the idle screws, float needles, air, and the jets until all the debris is removed. You can also remove the stubborn debris by spraying compressed air into the holes. Always remember to put on protective garments such as gloves and glasses while cleaning the carburetor.

Once you are sure your carburetor is clean, you can return it back to the pressure washer.

Best Rectangle Trampoline

Conclusion

It is not advisable to leave your engines sitting unused or without running it for a long period of time.

However, sometimes this might just occur because of the unavoidable circumstances until the fuel then starts to break down.

In that case, you should ensure that you have replaced all the fuels in the tank first before you even think of starting the engine. Otherwise, you might double your problems.

Filed Under: Home

Best Rectangle Trampoline

Best Rectangle Trampoline

January 26, 2020 By clarkie Leave a Comment

Most people only know and purchase a round trampoline. But, you can also consider purchasing the rectangle trampoline as well. People don’t purchase the rectangle trampoline, because they don’t really know much about these trampolines. 

The moment that you know more about these trampolines, you will understand why it is getting so popular among buyers. This is everything you need to know about the best rectangle trampoline to make the decision to purchase one a lot easier. 

Should You Buy Rectangle Trampolines or the Round One

best rectangle trampoline brands

The first question that you might be asking is if you should buy the rectangle trampoline or the traditional round one. Many people are purchasing round one because this is the most popular and common one to buy. 

The rectangular ones let you jump higher and further. However, you will need to have more yard space in order to have one. This is because it is larger than the round ones.

Most of the rectangular ones are coming installed with safety nets, because of the risks that can be involved when jumping. This is also the trampoline for adults that have some trampoline experience as well. 

Benefits of Buying the Rectangle Trampolines

What are the benefits of buying the rectangle trampoline? Why is this something that you should consider? There are many reasons why the rectangle trampolines are a better choice than the normal round ones.

  • These trampolines give bigger bounce. Letting your bounce higher.
  • This is a great trampoline to have for a professional gymnast to practice at home
  • The rectangular trampoline is also a trampoline that can be used by the whole family. From the youngest member to the parents. 

Essential Features That You Need to Look for

best rectangle trampoline for adults

Just like with the round trampolines, there are a couple of features that you need to look for when you are purchasing the rectangle trampoline. Features that will make sure that you are purchasing the higher quality trampoline. These are some of the features that you need to look.

  • Safety features of the trampoline are essential
  • The weight limit of the trampoline
  • The size and material that the trampoline is made of
  • Safety net included or not?

Things to Consider When Purchasing a Rectangle Trampoline

When you are purchasing your rectangle trampoline, there are a couple of things that you need to consider. This is to make sure that you are purchasing the right trampoline for your needs. These are some of the things that you need to consider when you are purchasing a rectangle trampoline.

  • The available size that you have in your yard for the trampoline. Luckily there are different sizes that you can purchase the rectangle trampoline in. 
  • The material that the trampoline is made off. The more durable the material the safer it will be
  • What reviews are saying about the type of trampoline that you are considered to purchase
  • The total weight limit that can use the trampoline. This is to make sure that everyone can use the trampoline without any problems. 
  • Any bonus safety features that are included with the trampoline

Some of the Best Rectangle Trampolines to Purchase

best rectangle trampoline for tumbling

When you are purchasing any one of these rectangle trampolines, you will purchase one of the best trampolines you can find. Making sure that you are getting value for money. 

  1. Skywalker Rectangle Trampoline with Enclosure, 15-Feet
  2. JumpSport 10×17 Feet Staged Bounce Rectangle Trampoline
  3. Upper Bounce Rectangular Trampoline with Fiber Flex Enclosure
  4. AlleyOOP 10’×17’ PowerBounce Rectangle Trampoline
  5. Upper Bounce Easy Assemble “Spacious” Rectangular Trampoline
  6. Summit 14′ Rectangle Trampoline with Safety Enclosure

Conclusion

Rectangle trampolines might not be as popular as the round ones, but they are actually a lot better. In quality and its safety. If you are looking for extra bounce, and want everyone in the family to enjoy a jumping experience, then this is the best type of trampoline to consider. 

They might be a bit more expensive than round trampolines, but they are more value for money. Ensuring a lot more safety, bounce, and fun. There are a variety of different rectangular trampolines that you can purchase, so finding the best one for your family won’t be hard.

Best Lacrosse Rebounder

You just need to make sure about the size of the trampoline and the size of the yard that you have available. And, you need to make sure that this is one of the highest-rated trampolines on the market. 

Rectangular trampolines are more fun than having round ones. Especially for teens and for adults. However, even children can play on it. With this complete guide, you will know everything there is to know about these trampolines, and you will be able to know if this is something that you can consider purchasing.

With the right size, weight limit, and safety features, you will have a trampoline that will give you and your family years of fun. 

Filed Under: Sports

Pros and Cons of Grain-free Dog Food

Pros and Cons of Grain-free Dog Food

January 26, 2020 By clarkie Leave a Comment

As we are going to discuss the pros and cons of grain-free dog food let us understand its ingredients. Grains such as wheat, barley, oats, corn, etc., are added to the dog food. They are not inherently bad but low-quality fillers derived from corn, wheat, etc. should be avoided. 

Whole, organic or natural foods are unprocessed and contain the complete nutritional profile of the grains. Whole grains are healthier as they are not degraded due to processing. But they should be high quality and digestible to the dog. 

If your dog is allergic or sensitive to grains then a grain-free diet is advisable. Your dog will get high quality and digestible food as it contains legumes, beans, vegetables and other plant-based sources of the basic food groups. 

Pros and Cons of Grain-free Dog Food

pros and cons of grain free dog food

We discuss the pros and cons of grain-free dog food so that you can decide for yourself if it is right for your pet.

Pros of Grain-free Dog Food

A grain-free diet does not mean no carbohydrates. Carbohydrates are made of 3 components – sugar, fiber, and starch. Fiber and starch are complex carbohydrates that release energy slowly. While sugar is a simple carbohydrate that releases energy immediately.

Starch from dog food ingredients such as tapioca, beans, vegetables, legumes, and potato digests slowly to release energy over time.

Grain-free dog food is meant for canines that cannot digest grains. Usually, all dogs have enzymes to digest, absorb and utilize the nutrients from grains. But in the case of those dogs that cannot – grain-free dog foods are a blessing.

Dogs may be allergic to grain proteins such as gluten. Their system may identify the protein as an invader and produce histamine. This causes the dog to chew, scratch and itch incessantly. A grain-free diet may be recommended in this case. 

Other health issues that benefit from grain-free dog food are dog obesity. The low carbohydrate diet causes their body to utilize the fat and proteins to produce energy. 

A low carbohydrate diet or grain-less diet is recommended for dogs diagnosed with cancer or diabetes. Low carbohydrate and high-fat diet with fish oil help speedy recovery and extend a disease-free remission. 

pros and cons of feeding grain free dog food

Grain-less dog food also helps manage the production of insulin for diabetic dogs. Some grains have a high glycemic index. The high glucose level challenges insulin levels. 

Lectins and glutens in some grains cause inflammation. Chronic gut inflammation occurs where the superficial layers of the intestine have eroded. This impairs the secretion of enzymes that aid in immunity, digestion, and absorption of nutrients.

The malassimilation of carbohydrates causes diarrhea. If this malabsorption continues it leads to bacterial fermentation and overgrowth that causes flatulence, and other issues.

How to Use Guillotine Dog Nail Clippers

The Cons of Grain-free Dog Food

Regular dog foods include a balanced amount of grains in them. This provides complex carbohydrates that digest slowly and release energy throughout the day. Grains are nutritious. They are loaded with vitamins, minerals, proteins, carbohydrates, etc. The dogs are disallowed the benefits of grains.

Grains are also rich in fiber that binds the feces and helps in gut motility. This helps clean the digestive tract and maintain weight. Grains can delay gastric emptying; this slows down the small bowel transit time.

During this time the bowels bind the toxins and bile acids that irritate the bowels. The overall process normalizes the gut motility. The slow transit of fiber also causes the animal to feel full longer which curbs the appetite.

Grains are also rich in lean protein. The gluten in the grains is a high-quality protein. Though it is not as bioavailable or intestinally absorbable as animal-sourced proteins. The high-quality whole-grain diet helps fortify other protein sources that contribute to your dog’s health. 

what are the pros and cons of grain free dog food

The combined effect of the nutrients, fibers and regular bowels sets up a healthy gut fauna. A healthy gut ensures a healthy heart, brain and immune system. This promotes healthy sleep, improves the mood and prevents auto-immune diseases and cancers. 

Some pet owners believe that a grain-free diet means a high protein or meat diet. This is not true as this dog food includes peas as a first and alternative ingredient to grains. The following ingredients may be chicken meal and fats; which is not meat.

Grains have lower fat content than meat. A balanced diet of meat and grains helps control weight by reducing calories. 

A study by FDA informed of the deleterious effects of the grain-free diet on these fur babies. It found that the dogs fed on lentils, peas, potatoes, and legumes had higher chances of suffering from Canine Dilated Cardiomyopathy. 

Regardless of the pros and cons of grain-free dog food your dog deserves a balanced diet. As one size does not fit all it is recommended that you formulate a diet that supports your pet’s needs. The factors to consider would be the pet’s activity level, age, size, health issues, etc.

You may not need to include grains. But it is always wise to consult with your veterinarian to personalize your pet’s food.

Filed Under: Pets

How to Use Guillotine Dog Nail Clippers

How to Use Guillotine Dog Nail Clippers

January 26, 2020 By clarkie Leave a Comment

Grooming your dog is one of the things that a dog owner needs to do. But clipping their nails can be hard. Especially if you don’t make use of the right dog nail clipper. Many dog owners are recommending the guillotine dog nail clipper, and with good reason. 

But, before you can go off and purchase your own guillotine and start clipping, you need to know a couple of things. These are some of the things that you need to know about the guillotine dog nail clippers and how you should use it correctly. 

What is Making the Guillotine Dog Nail Clipper Different

how to use chi guillotine dog nail clippers

The first thing that you might wonder, is what is making the guillotine dog nail clipper different from the rest? There are many different nail clippers for pets available, but this one is by far the most recommended.

This is because it makes cutting nails a lot easier, and faster and ensures that the pet stays comfortable. It allows more force and will make it easier to cut with the first slice. It is great to use for people with arthritis or that doesn’t have a lot of strength in their hands.

And, it is the one clipper that is making it less stressful for the animal as well. You will have less chance of cutting off too much of their nails, causing it to bleed. 

On Which Dogs Can You Use the Guillotine Nail Clippers

A question that many are asking, is on which type of dogs can you use the guillotine nail clippers. Are this designed for larger breed dogs, or for smaller breed dogs?

The first guillotine dog nail clipper was designed for the smaller breed dogs that don’t have tough and hard nails to clip. However, over time, these dog nail clippers have changed and now it can be used for any type of dog. You just need to make sure that you are purchasing the right one for the type of dog you have. 

When You Are Choosing the Guillotine Dog Nail Clipper

how to sharpen guillotine dog nail clippers

There is a different type of guillotine dog nail clippers available on the market. And, you need to make sure that you are purchasing the right one. A quality, sharp nail clipper that isn’t too expensive is the thing that you want to consider.

However, you want to make sure that the blades are staying sharp, or that you can replace or sharpen the blades after a couple of uses. You also want to make sure that this is the right dog nail clipper for the size dog that you have.

Reading a couple of reviews, before you are deciding on the guillotine dog nail clipper for you, will ensure that you are going to get value for money, and make sure that you aren’t going to struggle again with cutting your dog’s nails. 

How to Use It Correctly

how to use a guillotine dog nail clipper

If you are following these steps in how to use the guillotine dog nail clippers correctly, you will see that it is really easy to use, and you will be able to use it without any problems.

These are the steps in how you should use it correctly to ensure that your dog stays comfortable.

  • Let your dog gets comfortable with the guillotine dog nail clipper. Put it in front of them, so that they can sniff it and make sure that they see that it isn’t a threat. 
  • Make sure that your dog is comfortable, while you are picking up your dog’s paws. You should not continue with cutting their nails if they are uncomfortable. They might hurt themselves in the process.
  • If this is the first time that you are cutting your dog’s nails, make sure that you are cutting small amounts off at first. Cutting off too much will hurt and cause it to bleed.
  • Giving treats while you are cutting their nails is a way to reward them for sitting still and letting you handle their paws. This will also let them sit still for long so that you can cut all four paw’s nails. Talk to them and playing with them, in-between is a great way to spend time with them, while you are using the guillotine to cut their nails.
  • Clean the nail clipper after using it and store it away for the next time. If you keep the clipper maintained and clean it can be used for a long time.

Now, you know everything there is to know about the guillotine dog nail cutter. From why this is a preferred cutter by professionals, to the steps on how you should cut their nails. This can be a great time to bond with your dog, if the dog stays comfortable and if you don’t hurt your dog in the process.

Don’t hurry when you are cutting the nails, and make sure that you have treats at hand.

Filed Under: Pets

Best Mattress for Fibromyalgia

Best Mattress for Fibromyalgia

September 20, 2019 By clarkie Leave a Comment

Only people that are struggling with fibromyalgia will know how difficult sleeping at night can be. However, the good news is that sleeping can be made a bit more comfortable if you have the right mattress for this disease.

This is why this guide is so important. It will give you all the information you need so that you can find the best mattress for fibromyalgia. So that your sleep at night, can be pain-free and as relaxed as possible. This is everything you need to know.

What is Fibromyalgia?

best mattress for fibromyalgia patients

The first thing that you need to know, is what the medical condition fibromyalgia is in the first place. You will not be able to find the best mattress for fibromyalgia if you don’t know what this condition is in the first place.

Fibromyalgia is a musculoskeletal disorder that is causing chronic pain. Fibromyalgia can affect every part of daily life. Fibromyalgia can make achieving deep, quality sleep a constant fight. Powerful aches and pain may disturb patients during the night, disrupting their sleep and leading to exhaustion.

Fibromyalgia can also cause sensitivity to heat and cold conditions, resulting in overheating during the night or getting cold throughout the night. The condition is also related to other sleep disorders like insomnia, sleep apnea, and restless leg syndrome that can cause even more problems during the night.

Why Is It Important to Have the Right Mattress for Fibromyalgia?

the best mattress for fibromyalgia sufferers

The only way to make sure that a person that is struggling with fibromyalgia is getting the best possible night rest is to purchase a mattress that will lessen their condition and that will prevent problems like insomnia and chronic pain keeping them awake.

The better the mattress, the less pain they will have during the night, and the better sleep they will get. Making sure that they will get through the day without feeling tired all the time. The mattress is playing a big part in a person with fibromyalgia to be able to sleep better. This is why it is important to take the time and to find the best possible mattress for fibromyalgia.

Things to Consider When Purchasing a Mattress for Fibromyalgia

How to Ship a Mattress

There are a couple of things that you should consider when you are purchasing a mattress for fibromyalgia. Things that will mean the difference between having a good night rest, and having problems with sleeping and having pain while lying down. These are things to consider for people that are struggling with fibromyalgia.

  • Your frequent sleeping position and the position that you are most comfortable in. Some mattresses are designed for certain sleeping positions.
  • Are you struggling with overheating at night? Then finding a mattress that is keeping you cool is essential.
  • Struggling with chronic aches and pains when sleeping in one position, or when you are sleeping with someone
  • The price of the mattress. Some of these mattresses designed for fibromyalgia can be expensive but will be worth the money spend.

Some of the Best Mattress That You Can Purchase for This Condition?

best mattress firmness for fibromyalgia

With the large variety of mattresses that are available, it can be hard to find one that will best for fibromyalgia. There are many different problems that people with this condition can struggle with. Some mattresses are designed for different fibromyalgia symptoms.

Even, if this is recommended that you are doing as much research as possible, to find the best mattress for your fibromyalgia symptoms, these mattresses might be one a great fit for you and your symptoms.

  • Layla Mattress is great for people in any sleeping positions and that tends to sleep hot. Great for people with fluctuating firmness preferences. Can withstand any weight.
  • Brooklyn Bedding Bowery for people that sleeps on their backs and sides. Ideal for light and average-weight people. Designed for those with chronic aches and pains.
  • Loom and Leaf mattresses are also designed for back and side sleepers. Great for people from any weight. Designed for people with Back pain and arthritis sufferers.
  • Casper Mattress is great for back and side sleepers. Designed to assist people that are struggling with back pain and it is great for couples that are sleeping together.
  • Tuft and Needle Mint Mattress is for every type of sleeper. Great for those that are overheating at night. And, you are going to get value for money.

When you are struggling from fibromyalgia, you will know that sleeping at night can be hard. And, that you need to have a great quality mattress in order for you to get a good night rest. This guide is giving you all the information you need to know how to find the best mattress for Fibromyalgia.

So that you can get value for money, but that you can have a good night rest as well, without waking up with aches and pains. There are many mattresses that are designed to make fibromyalgia sufferer’s lives a lot easier.

Filed Under: Home

How to Ship a Mattress

How to Ship a Mattress

September 20, 2019 By clarkie Leave a Comment

This might not be something that you need to do every day, but for that day that you really need to ship a mattress, you might want to get as much information as possible.

There are a couple of things that you need to know about how to ship a mattress safely and as cheap as possible. This is the only way that you can make sure that your mattress is going to arrive at its destination in one piece. This is everything that you need to know about how to ship a mattress safely.

Is It Really Worth It?

how to ship a mattress cross country

Before you can know how to ship a mattress, there is one important question that you should ask first? Is it really worth it to ship a mattress to another country, or just to another town?

If you are wondering why we are asking this question, you probably didn’t do research about the shipping costs of shipping a mattress. You should make sure that the shipping costs aren’t more than what the mattress is worth. And, you should consider why you want to ship a mattress in the first place. Many people are moving to another country, selling everything, but prefer to take their mattress with them. No matter what the costs. Now, that you know if this is worth it to ship your mattress, and paying shipping fees, you can start to learn how to ship your mattress safely.

You Might Want to Add Insurance to the Shipping of the Mattress

Just because a mattress is large, it doesn’t mean that you don’t need to add insurance on your mattress. This is exactly the reason why you should add insurance to your mattress. The shipment and the value of the mattress are expensive. And, you need to make sure that you don’t lose money when the mattress is getting damaged, or lost during the transport.

Adding insurance to your mattress, when shipping it, isn’t that more money than the shipping costs. But, this is going to ensure that you don’t lose the mattress and the money you put into the shipping.

Making Up the Package or Hiring a Service to Do It for You?

Here, you have two options. You can make up the mattress for shipping yourself, or you can hire a service to do the package and shipment for you.

Most people prefer to hire a professional to ensure that the mattress is packaged correctly and safely. However, if you want to do it yourself, you should consider a couple of things. You should consider the size of the mattress, the type of mattress that you are shipping and the total weight. Some shipment packages don’t accommodate heavy items, and some mattresses can’t be stored in an upright position.

Purchasing the Right Package to Ship the Mattress in

how to ship a mattress across the country

When you are preparing your mattress for shipment yourself, you will need to purchase a couple of things. You will need to make sure that you have wrapped for protection like a stretch wrap, bubble wrap or high-density packing foam. You will also need a mattress storing case or even a pallet that is big enough for the mattress.

Buying all these things to package your mattress correctly, to support and protect the mattress during shipment, you might as well pay the shipping company for preparing the mattress for shipping, and not doing it yourself. You will also know for sure that the mattress will be protected and stored correctly.

Getting as Many Quotes as Possible

The Hanging Hammock Tent – Ultimate Guide

As we said in the beginning shipping a mattress is going to be expensive. This is mostly because of the size of the mattress and the total weight. The larger the mattress, the more expensive it is going to be.

The good news is that there are many couriers and shipping companies that are shipping mattresses all over the world. So, you can get a lot of quotes to ensure that you are using the cheapest possible quote. And remember to add the insurance to the quote as well. You should also make sure that with the quotations that you are getting, there aren’t any hidden fees outstanding.

With your quotes in hand, you can start doing research and make sure that you are using the most affordable courier or shipping service, but that you are going to get value for money as well. The more quotes you are going to get, the easier it will be to find a cheap quote.

How to ship a mattress, isn’t a question that everyone is asking. However, when you need to ship your mattress, you might need to know how you can do this, so that your mattress is staying in a good condition, but to ensure that you don’t pay more for the couriers than what the mattress is worth.

With these tips, you will know for sure about how you can ship your mattress, the easiest way, and the cheapest possible way to another town, city or country.

Filed Under: Home

Best Lacrosse Rebounder

Best Lacrosse Rebounder

July 4, 2019 By clarkie Leave a Comment

Lacrosse is a ball game that involves the art of mastering skills to ball handling, reaction speed, footwork, and moves in the fast-paced scenario. You need a lacrosse rebounder to practice this game and it consists of a rectangular or square frame with elastic and rubbery material inside. The rubber helps to facilitate the rebounding back of the ball that you throw at the lacrosse rebounder. 

The best lacrosse rebounder helps the players to practice lacrosse on their own.  The player needs a rebounder they can stand in the garage or yard and they can enjoy the game. There are different types of lacrosse rebounders and they come in different shapes and sizes.

While your personal preferences determine the rebounder you can purchase, there are certain things you should know about the product. To get the best lacrosse rebounder, you need to consider some important factors.  

How to Choose the Right Lacrosse Rebounder

best lacrosse rebounder drills

Lacrosse rebounders come in different types so it is significant that you choose the appropriate product that suits your requirements. The following factors can help you make an informed decision when you buy a rebounder.

1. Size of Your Yard

The size of your yard will determine the size of the lacrosse rebound that you can purchase. You probably need a smaller rebounder if your yard is small or a dampened one that can reduce the throw back. A rebounder with adjustable tension is ideal if your yard is small.

The other aspect you should consider is the actual size of the rebounder. Most rebounders have a rebound pad that is 3 feet by 4 feet and they are 7 feet tall and 3 feet wide. Other rebounders can be more than 8 feet wide.

2. How often will you M Your Lacrosse Rebounder?

Most lacrosse rebounders consist of aluminum or steel but the issue is that they can corrode due to weather conditions if left in the open. Therefore, if you wish to store your rebounder in a safe place after using it to keep it neat, then you can consider a portable one.

Lacrosse rebounders are made of different types of materials which can make them heavy. The heavy ones also offer added advantages since you can perform various activities on them. If you have plans to use the rebounder for many years, then go for one that is durable and protected against bad weather elements.

3. Check Reviews of the lacrosse rebounder

Lacrosse rebounders can have different issues such as arriving with missing parts as well as hard to assemble. Some rebounders may not last for longer periods as you may expect. You cannot get this information from the manufacturers since they all present their product as the best. You can get in-depth information about the rebounders by checking reviews of the rebounders by customers who have used them. Avoid rushing into making decisions to buy.

4. What is your budget?

Whenever you intend to buy a lacrosse rebounder, you should always have a budget just like you do when you buy other products. The prices of rebounders range from $50 to $500 but the ones with a better quality start from about $150. While the lower price is attractive, it can compromise the aspect of quality.

5. What Kind of User are you buying the Rebounder for?

best rated lacrosse rebounder

If you are an experienced lacrosse player, then you will need to get a fully adjustable rebounder. This type of product is flexible and it gives you a lot of options to improve your skills. However, if the rebounder is for kids, you should try to get something affordable.

6. What should be the size of the wall?

Your personal preference determines the size of the wall. A smaller wall can be beneficial to experienced players since it has a high throwback. A smaller wall helps you to improve your accuracy. Children would prefer larger walls since they are easy to hit compared to small walls. You should make a choice that suits the needs of the players when you buy a rebounder.

If you are an experienced player, you may consider a wall that is off the ground since it helps to improve your skills. For children you should choose a rebounder that goes to the ground. The kids can also use this particular type of rebounder for other sports like soccer and baseball. The kids will use the same equipment to train in different sporting disciplines.

7. Determine the angle of the wall

If you are an experienced player, you need to consider how you will be able to angle your rebounder. This will allow you to practice a variety of drills if you can set your rebounder on different angles. A rebounder that is adjustable gives you many options upon which you can select the desired angle.

With these factors in mind, you can select the best lacrosse rebounder.

Filed Under: Sports

Guide to Make Smoked Chuck Roast

Guide to Make Smoked Chuck Roast

June 13, 2019 By clarkie Leave a Comment

If you are thinking of hosting a party, you can treat your guests with a smoked chuck roast. You can make this juicy smoked chuck roast on your own and it has many advantages over common holiday meats.

Beef chuck is relatively cheaper compared to prime rib or tenderloin and it is readily available in various grocery stores. With smoked chuck roast, you can serve between eight and ten people and it requires about six to eight hours preparation time.

To prepare your chuck roast, you will need butcher’s wine and about four to five-pound beef. On top of that, you will need the following ingredients:

  • 1 tablespoon salt
  • 1 teaspoon cayenne pepper
  • 2 teaspoons black pepper
  • ½ teaspoon chili powder
  • 1 teaspoon oregano
  • 2 teaspoons garlic powder

You will also need either a charcoal grill or water smoker to make your chuck roast. To grill the chuck beef, you can use charcoal or wood chips and a probe thermometer is vital.

You should also heavy a pair of tongs and heavy-duty aluminum foil.

Steps in Preparing Your Smoked Chuck

how to smoked chuck roast pellet grill

You start by rinsing your chuck roast weighing about five pounds with cold running water then dry it with paper towels. You must also tie your beef chuck with twine such that it will form a grid-like pattern around the meat.

You then combine all the ingredients in a bowl and mix with a Wisk for a perfect mixture. When the mixture is ready, you then rub it on all sides of the chuck roast. You can also wrap the chuck roast in plastic and put in the fridge for about four hours to cure or even overnight.

You can smoke the chuck right away but placing it in the refrigerator enhances penetration of the spice rub into the meat.

1. Preparing Your Smoker

how to smoke chuck roast for pulled beef

Start by soaking a few quantities of wood chips for about 30 minutes in water before you place them on coal. You should preheat charcoal grill or smoker to 250 degrees F.

You should use half the charcoal so that you can maintain a low temperature. Alternatively, you can use a drip water pan directly under the meat to maintain the temperature when using a charcoal grill.

When the coal is ready, you then place your chuck on the center of the grill. You should then constantly toss the soaked wood chips together with some dry wood onto the hot coal to smoke the beef.

Dry wood increases the intensity of smoke and heat while wet chips provide lower and slower smoke that also reduces the heat.

It is important to regulate the heat for better results. You need to add new wood chips and fresh coal after every hour for about four hours during the smoking process.

You should maintain the temperature of the smoker at 250 degrees F every hour to achieve the desired results. It is also important to maintain the smoke at the same level.

It is always crucial to know the temperature of the grill. You can buy a BBQ thermometer if your grill does not have one.

It is also important to make sure that the thermometer has double channel for smoke and meat to ensure that they are maintained at the right level.

2. Testing for Readiness of the Chuck

how to smoke chuck roast on a traeger grill

To test that your meat is done, you can use a read meat thermometer. You should smoke the chuck roast until it gets dark outside. The internal temperature should be 190 degrees F during the cooking process of about 6 to 8 hours.

The appropriate temperature of well-smoked chuck should not be less than 160 degrees F. However, the maximum interior temperature of your chuck roast should not be more than 200 degrees F otherwise it can lead to dryness of the meat.

3. Holding the Chuck

how to smoke chuck roast recipe

When you remove the chuck from the smoker, you should wrap it using a heavy duty aluminum foil and use a double layer. Return the chuck roast to the smoker for about an hour while maintaining a maximum temperature of 250 degrees F.

The process of holding the roast helps to improve its tenderness and prevent the meat from drying out.

You must carefully unwrap the meat and allow it to sit for about 30 minutes so that it can cool. You should leave the internal temperature to drop to about 150 degrees before serving.

Once you cut the chuck roast, you must know that it quickly dries out. You should begin by cutting off the twine then cut the roast into thin pieces.

You must also make sure that you slice the meat that you are only serving at a particular moment. You can serve the sliced roast chuck with your favorite sauce.

Filed Under: BBQ

How to Brine Pork Shoulder

How to Brine Pork Shoulder

June 13, 2019 By clarkie Leave a Comment

There are different reasons why you should brine the pork shoulder. This part of the meat is usually big and it might not be very easy to cook.

Brining is a vital process that you should perform if you want to improve the moist and taste of your meat after cooking. If you want to prepare your meat using the method of grilling or smoking, brining is an essential procedure.

When grilling your meat, high temperature may cause it to be dry in the interior. As such, the brine becomes essential before cooking to keep the meat moist inside while at the same time giving it a great taste.

Essentially, the process of brining is aimed at preventing the meat from dehydrating so that you can eat it comfortably.

Brining is also advantageous in that it improves the aroma of the meat and makes it juicy. The process also gives your meat a nice color such that you will enjoy every bit of the delicious meal. To prepare your pork brine, you should have certain ingredients that you should use.

Ingredients of Pork Brine

how long to brine pork shoulder before smoking

The basic ingredients of brine mainly include water, salt, sugar, onion, paprika, bay leaf, cayenne, garlic, peppercorns, and other seasonings. You can reserve some of the ingredients for the actual cooking of the meat. 

The brining process involves some simple steps that you should carefully follow. To begin the brining process, you need to begin by adding water to a bowl where you will dissolve the salt and brown sugar. When the solution is ready, put it in a bag then place it aside.

The next steps involve mixing all the ingredients in a bowl while also making sure that the remaining salt and sugar in the bowl are properly absorbed. When all the contents have been thoroughly mixed, you then add them to the salt and sugar solution in the bag you set aside.

Before adding your pork to the brine, you must reserve two cups of the brine that you will use later for cooking. After this, you can then add your pork meat to the brine.

Make sure the meat is submerged in the brine and you should put it into the fridge for a minimum of about eight hours. It is still okay to leave the brine in the fridge for 24 hours.

How to Cook Brined Pork Shoulder?

how to brine pork shoulder for smoking

After the lapse of 24 hours, while your brine is in a fridge, it will be ready for cooking. You begin by rinsing the pork with running water before drawing it to the cutting board.

You can either cook the pork slowly on your smoker at the temperature of 225 degrees F or use your oven at the temperature of 350 degrees F.

Make sure that the pork is completely dry before beginning to cook it. You can add your preferred flavors when you cook the meat. When you are using the smoking method for cooking, then you can apply paprika, sugar, salt as well as crushed peppers.

You can apply these ingredients direct to your meat to improve the taste regardless of the fact that they were also in your brine. The application of dry ingredients also helps to create a layering effect of different flavors on your meat.

The dry rub of ingredients on top of your meat also gives it a delicious bite. When you leave the brine to set onto the meat, it will reach even the center of the initial thick piece of meat.

Brining also helps to retain some moist in the meat during cooking so that it does not become dry.

Applying the Reserved Brine to Your Pork Shoulder

how long to brine pork shoulder

You can slowly cook the brined pork should for a period of six to eight hours using your favorite smoker. Alternatively, you can cook quickly the meat in a period of about two to three hours. When your meat is cooked, this is the right time to take that reserved brine.

You pour the contents slowly over the cooked meat or you use a brush to apply it. The aim is to increase the flavor content on your meat while at the same time making it moist for easy chewing. You should not overcook the meat such that it will exceed the recommended internal temperature.

The internal temperature of the meat should be about 160°F. When you attain this temperature, you can then pull off the meat then wrap it using a tin foil for a period of 30 minutes.

This process will allow the juices from continuing to circulate and set on the meat. When your brined pork is ready, you can serve it along with your favorite BBQ sauce.

You can also cut it into small slices that are easy to eat and you should serve it while still warm.

Filed Under: BBQ

How To Properly Set Up Your Dart Board

How To Properly Set Up Your Dart Board

June 2, 2019 By clarkie Leave a Comment

Each game has a set of rules and special equipment that is used by the players. It is important to ensure that the equipment and other accessories for the game are properly set. If you love darts, then the first thing that you need to buy a traditional dart board (or electric dart board), a darts set including 6 units, also should familiarise with is setting the dartboard properly. It will be a futile exercise to practice darts when the board is wrongly set.  

In this post, you can get more information about how to properly set your dart board. The major factors to consider when setting a dart board includes mounting options, height as well as throwing distance and many more.  

What Are the Official Dartboard Measurements?

When setting a dart board, you should know the official measurements that should be strictly followed every time. These measurements are internationally recognized.  First of all, you must choose a place with sufficient space in your home where you can mount your dartboard to ensure that there are no disturbances.  

The height for both steel tip and soft tipped darts must be five feet eight inches or 1.73 meters. This height measures the distance from the floor to the center of the dart board which is also called the bull’s eye.

The throwing distance is measured from the face of the dartboard mounted on the wall, not the wall itself. A standard 18-inch dart board is approximately one and a half inches thick. Therefore, the correct measurement of the throwing line must be 7 feet 9 ¼ inches or 2.37 meters from the surface of the dart board.

To check if the dartboard is correctly mounted in terms of its height and distance, you can use a diagonal line between the mark of the throwing line and the board’s center bull’s eye. This diagonal line should measure 2.93 meters or 9 ft 7 3/8in.

Your throwing line should be marked by either a wooden bar or a simple line on the floor but the former is more appropriate. The wooden bar makes overstepping the line impossible. It is a standard measure in different places as well as during significant games.

Mounting the Board

A dartboard comes with a clip that is mounted on the wall. There is a screw at the back of the board that is located at the center of the bull’s eye and it is fitted into the clip mounted on the wall. You must make sure that the clip is mounted at the correct height.

You must always make sure that number 20 on your dart board comes on the top and also ensure that the scoreboard is either on the left or right of the dart board. When you mount the board to the wall, make sure you fix it with wooden pieces or board to hold it firm so that it does not move.

Other dart boards come with spring clips that you can mount at the back of the board. There is no rule that spells the exact location of these spring clips. It is important to evenly spread them especially in a triangular formation to prevent any movement.

The other important aspect that you should consider is to protect your walls. You can design a wooden cabinet that is sufficient enough to cover the surface of the wall around the dartboard. Alternatively, you can use plywood board that will act as a shield against stray arrows.  

Flooring and Lighting

Other factors to consider when setting your dart board include lighting and flooring. You must consider putting a dart mat or carpet on top of either wooden or concrete floor. The dart tips can damage the wooden floor in a scenario where they miss the dart board or bounce.  A carpet also helps to prevent the dart tips from damage if they hit a concrete floor.

You must also make sure that you mount your dart board away from the window in case the darts may bounce off the board and cause damage. The board should also be in a safe place so that the arrows do not pose a threat to the onlookers if they bounce from the board.

Without sufficient lighting, your dart board set up is not complete. You must mount an overhead spotlight above the dart board to provide light directly on the surface of the dart board. You should make sure that there is no shade over the dart board since this can affect your view.

You do not need to repeat the process of setting up your dartboard regularly since you can leave it on the wall after the game. It can also play a role in decorating your walls so there is no need to worry about removing it after the game. Above all, you must always practice high safety standards within the area where you set your dart board.  

Filed Under: Sports

  • « Previous Page
  • 1
  • 2
  • 3
  • Next Page »

Recent Posts

  • How To Choose The Best Night Vision Binoculars?
  • How To Pick Up The Best Convertible Car Seat For Small Cars
  • Gaming Chairs With Footrests – The Best Way to Get One as Desired
  • Best 4 Cycle Trimmer – Ways to Clean Your Lawn At Ease
  • Ryobi String Trimmers Reviews – What To Know Before Purchasing

Categories

  • BBQ
  • Camping
  • Dart
  • Gardening
  • Home
  • Pets
  • Sports
  • Travel

Copyright © 2025 · Beloved Green